How to burn or Export Surface Model using Ez3D-i
Written on Jun 19, 2018
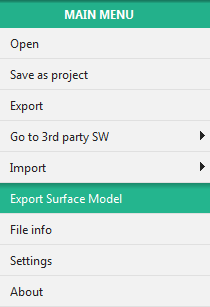
Open the Menu by clicking Main Menu button.

Click the Export Surface Model button.

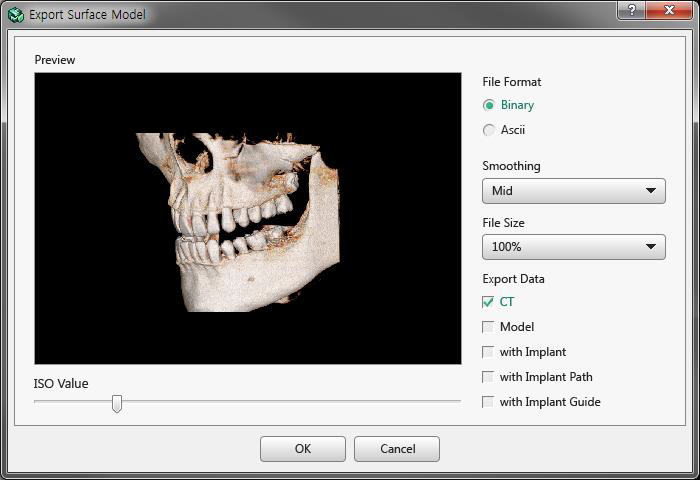
Select the format of the file, quality, and option to export.
- File Format: Choose the file format when exporting data, between Binary and ASCII – based on needs of the receiving party.
- Smoothing: Smooth surface when exporting CT files with the selected level.
- File Size: Reduce file size to the selected percentage when exporting CT Files
- Export Data: Select data type to be included in the exported data – based on needs of the receiving party.
- ISO Value: Adjust areas of ISO surface rendering.
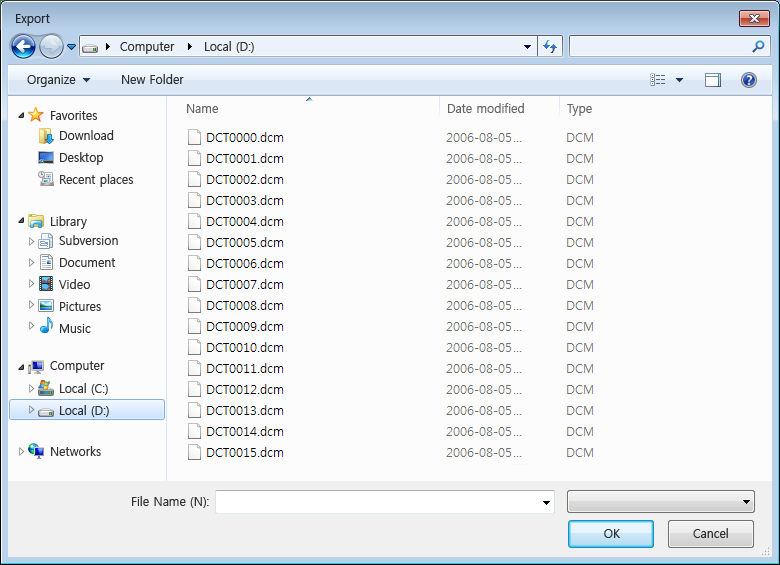
Click the OK button and the dialog to set a file name and the path appears as follows – choose the location normally in the windows browser window to save the files too.

Input the name of the file and select the file type to save, and click OK to start the process; the following windows appear and progress normally as shown:


When exporting is completed, the progress bar disappears, and the program will be available to use again. Close and locate the file path selected during the saving steps above.
You can either burn to a CD / DVD normally through Windows or save to FTP or other USB Media device.